
Image Source: i.ytimg.com
How Do You Reseal A Fish Tank: Leak-Proof It
Can you reseal a fish tank? Absolutely! If your fish tank is leaking, resealing it is a crucial step for preventing water damage and ensuring your aquatic inhabitants remain safe and healthy. This guide will walk you through the process of how to reseal a fish tank, making it leak-proof again.
Why Sealing Matters: The Core of Aquarium Maintenance
Fish tanks are essentially glass boxes, and the seams where the glass panels meet are the most vulnerable points. Over time, the original aquarium sealant can degrade, crack, or shrink, leading to fish tank leaks. This is a common issue that arises with older aquariums. Regular aquarium maintenance should include inspecting these seams. When leaks are detected, it’s time for an aquarium repair, and resealing is the primary solution.
Identifying a Leaky Tank
Before you can reseal a fish tank, you need to be sure it’s actually leaking and pinpoint the source.
Signs of a Leak:
- Visible water on the floor or around the tank: This is the most obvious sign.
- Water spots or mineral deposits on the exterior of the tank: These can form where water has seeped out and evaporated.
- Mold or mildew growth around the base of the tank: This indicates a persistent dampness.
- Lowering water levels that cannot be explained by evaporation or equipment: If your water level drops significantly without an obvious reason, a leak is likely.
Locating the Leak:
- Dry the tank thoroughly: Use towels to wipe down the outside of the tank, paying close attention to the seams and corners.
- Fill the tank slowly: Add a few inches of water at a time.
- Observe the seams: After each fill, check the exterior of the tank, especially the bottom corners and along the vertical and horizontal seams. Use dry paper towels to wipe down the seams; any damp spots will be easily visible.
- Patience is key: Sometimes leaks are slow. Leave the tank partially filled for a few hours or overnight to see if any moisture appears.
Gathering Your Supplies: The Right Tools for the Job
To reseal fish tank seams effectively, you need the correct materials. Using the wrong type of sealant can be harmful to your fish.
Essential Materials:
- 100% Aquarium Silicone Sealant: This is the most critical item. It must be specifically labeled as silicone sealant aquarium safe or aquarium silicone sealant. Regular household silicone sealants often contain fungicides or anti-mildew agents that are toxic to fish. Look for brands like Aqueon, Marineland, or GE Silicone I (if you can confirm it’s 100% silicone with no additives).
- Razor Blade or Scraper: For removing old sealant. A utility knife or a specialized sealant removal tool also works.
- Gloves: To protect your hands from the sealant and any residue.
- Paper Towels or Rags: For cleaning and drying.
- Rubbing Alcohol (Isopropyl Alcohol): For cleaning the glass surfaces before applying new sealant.
- Masking Tape or Painter’s Tape: For creating neat lines and preventing excess sealant from spreading.
- Caulking Gun: If your aquarium sealant comes in a tube that requires one.
- Plastic or Silicone Scraper/Smoothing Tool: For creating a clean, smooth bead of new aquarium silicone. A plastic spoon or even your finger (covered with a glove and perhaps wetted) can work in a pinch.
- Bucket: For water changes and cleaning.
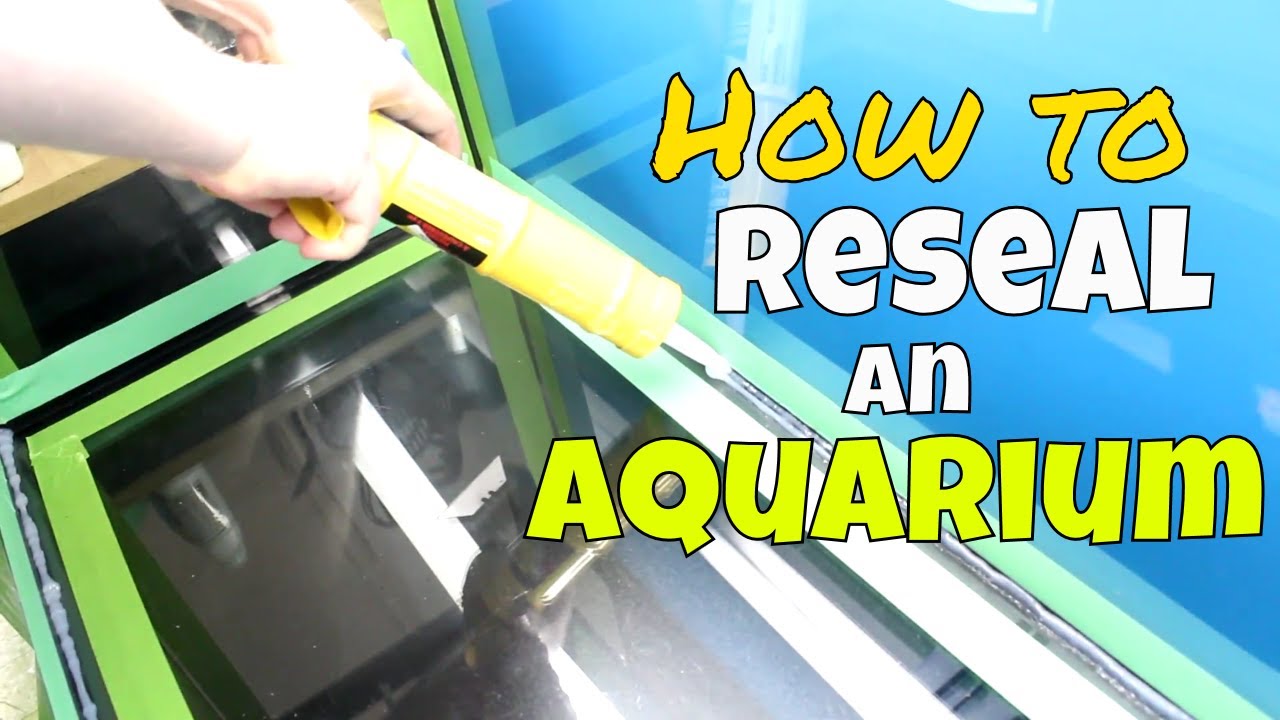
The Step-by-Step Process: How to Reseal A Glass Aquarium
Resealing a fish tank is a detailed process that requires care and precision. Here’s how to tackle it:
Step 1: Empty and Clean the Tank
This is a crucial first step. You can’t reseal a tank while it’s full of water.
- Relocate Inhabitants: Carefully transfer your fish, plants, and any other inhabitants to a temporary, safe container. Use the tank’s original water if possible to minimize stress. Ensure they have aeration.
- Remove Substrate and Decorations: Take out all gravel, decorations, filters, heaters, etc.
- Drain Completely: siphon out all remaining water. You can use this water for the temporary containers.
- Dry the Tank: Thoroughly dry the inside and outside of the tank with clean towels.
Step 2: Remove Old Sealant
This is often the most time-consuming part of the aquarium repair. Old sealant needs to be completely removed for the new sealant to adhere properly.
- Use a Razor Blade: Carefully insert the blade under the edge of the old sealant and gently push it along the seam. Work slowly and try to get as much of the old sealant off as possible without scratching the glass.
- Be Meticulous: Focus on removing all remnants of the old sealant from both the inside and outside of the seams. Even small pieces can compromise the new seal.
- Clean Up Residue: Use paper towels and rubbing alcohol to wipe away any remaining sealant residue. The glass needs to be completely clean and dry for the new sealant to bond.
Step 3: Prepare the Seams for New Sealant
Cleanliness is paramount for a strong, leak-proof seal.
- Clean with Rubbing Alcohol: Once the old sealant is removed, wipe down all the seams with rubbing alcohol. This removes any oils or residue that could prevent the new aquarium silicone sealant from adhering.
- Ensure Dryness: Make sure the seams and surrounding glass are completely dry before proceeding.
Step 4: Apply the New Aquarium Silicone Sealant
This is where you’ll apply the new aquarium silicone. Patience and a steady hand are key.
- Masking Tape: For the neatest results, apply masking tape along the glass edges on either side of the seam. This creates a clean line for the sealant and makes cleanup easier. The tape should be positioned where you want the edge of your bead of sealant to be.
- Cut the Sealant Tube: Cut the tip of the silicone sealant aquarium tube at a 45-degree angle, making a small opening. You can always cut it larger if needed.
- Load the Caulking Gun: Insert the tube into the caulking gun.
- Apply a Consistent Bead: Hold the caulking gun at a consistent angle and apply a steady, even bead of sealant along the entire seam. Aim for a bead that is thick enough to create a strong bond but not so thick that it’s difficult to smooth. Try to apply it in one continuous motion if possible.
- Focus on Corners: Pay special attention to the corners where panels meet. These are often high-stress areas.
Step 5: Smooth the Sealant
A smooth bead ensures a watertight seal and a professional look.
- Use a Smoothing Tool: Immediately after applying the bead, use a silicone smoothing tool, a plastic scraper, or a gloved finger dipped in soapy water (use plain water or a very mild, fish-safe soap if you must, but plain water is usually best) to gently run along the bead. This pushes the sealant into the seam and creates a smooth, concave surface.
- Remove Excess Sealant: Wipe away any excess sealant that squeezes out with a paper towel.
- Remove Masking Tape: If you used masking tape, carefully remove it while the sealant is still wet. Pull the tape away slowly and at an angle to avoid smearing the sealant.
Step 6: Curing Time
This is a critical waiting period. Do not rush this step.
- Curing Process: Aquarium silicone sealant needs time to cure and become fully waterproof and non-toxic. The curing process involves the silicone reacting with moisture in the air.
- Check Manufacturer’s Instructions: The exact curing time varies by brand and thickness of the bead. Always refer to the product’s packaging. Typically, it takes at least 24-48 hours for the surface to be dry to the touch and several days, or even up to a week, for the sealant to cure completely and be safe for fish.
- Ventilation: Ensure the room where the tank is curing is well-ventilated.
- Avoid Disturbing: Do not touch, move, or disturb the tank during the curing process.
Step 7: Testing the Seal
Once the sealant has fully cured, it’s time to test your work.
- Rinse the Tank: Rinse the inside of the tank thoroughly with clean water to remove any residual odor or uncured silicone.
- Leak Test: Fill the tank with water, checking all the seams carefully for any signs of leaks. Leave it filled for at least 24 hours.
- Observe: Keep a close eye on the water level and the exterior of the tank for any dampness.
Step 8: Reassembly and Refilling
If the leak test is successful, you can reassemble your aquarium.
- Add Substrate and Decorations: Put back your gravel, plants, and decorations.
- Install Equipment: Set up your filter, heater, and other equipment.
- Add Water: Fill the tank with dechlorinated water.
- Reintroduce Inhabitants: Once the water temperature is stable and the equipment is running correctly, you can reintroduce your fish and other aquatic life.
Common Mistakes to Avoid When Resealing a Fish Tank
Even with careful planning, mistakes can happen. Being aware of them can help you achieve a successful aquarium repair.
Pitfalls to Watch Out For:
- Using the Wrong Silicone: This is the most dangerous mistake. Non-aquarium-safe silicone can leach toxins into the water, killing your fish. Always verify it’s 100% silicone and aquarium-safe.
- Not Removing All Old Sealant: Incomplete removal of old sealant will lead to a weak bond and potential future leaks.
- Applying Sealant to a Wet Surface: Silicone will not adhere properly to wet glass. Ensure everything is bone dry.
- Rushing the Curing Process: This is a common temptation, but it’s essential to allow the aquarium silicone sealant to cure fully. Fish can be sensitive to uncured silicone fumes.
- Applying Too Much or Too Little Sealant: Too little won’t create a strong bond. Too much can be messy and difficult to smooth, potentially creating air pockets.
- Contaminating the Sealant: Avoid touching the freshly applied sealant with bare fingers or anything that might leave residue.
Resealing Large Aquariums vs. Small Aquariums
The general principles for how to reseal a fish tank remain the same regardless of size, but there are some practical considerations for larger tanks.
| Factor | Small Aquariums (e.g., 10-30 gallons) | Large Aquariums (e.g., 55+ gallons) |
|---|---|---|
| Water Volume | Easier to drain and manage temporary housing for fish. | Requires larger containers for fish and more water for temporary housing. |
| Weight | Manageable for one person to move or tilt slightly. | Extremely heavy; often requires multiple people or specialized equipment to move. |
| Seam Access | Easy to reach all seams from the inside and outside. | May require step ladders or scaffolding to reach top seams. |
| Sealant Amount | Requires less sealant. | Requires significantly more sealant; plan accordingly. |
| Curing Time | Same curing time, but potentially less ventilation needed. | Good ventilation is crucial due to larger amounts of sealant curing. |
| Risk of Damage | Less risk of catastrophic damage if a leak occurs. | Higher risk of severe water damage due to the large water volume. |
When resealing larger tanks, it’s often safer to lay them on their back (if possible and with adequate support) to access the bottom seams more easily. However, ensure the tank is stable and won’t shift. For very large or custom tanks, professional aquarium repair services might be a safer option.
Alternatives to Full Resealing
In some cases, a minor leak might not require a full reseal.
Spot Repair Options:
- Aquarium-Safe Epoxy Putty: For very small cracks or chips in the glass or at a seam, an aquarium-safe epoxy putty can sometimes be used as a patch. Ensure it’s specifically designed for underwater use and is fish-safe once cured.
- External Sealant: For hairline cracks on the exterior of the tank (not at a seam), a bead of aquarium silicone sealant applied only to the exterior can sometimes provide a temporary fix. However, this is generally not recommended as a long-term solution and won’t address internal stress on the glass.
It’s important to note that these are often temporary fixes. If you have any doubts about the integrity of the glass or the seal, a full reseal is the most reliable method for preventing fish tank leaks.
Frequently Asked Questions (FAQ) about Resealing Fish Tanks
Here are some common questions people have about how to reseal a fish tank.
Q1: How long does aquarium silicone take to cure?
A1: Most aquarium silicone sealant products require at least 24-48 hours to cure to the touch, but it can take up to 7 days (or longer, depending on humidity and temperature) for the sealant to fully cure and be completely safe for fish. Always check the manufacturer’s instructions.
Q2: Can I use regular household silicone sealant?
A2: No, absolutely not. Regular household silicones often contain fungicides, mildew inhibitors, and other chemicals that are toxic to fish and invertebrates. You must use 100% aquarium silicone sealant.
Q3: What if I see tiny bubbles in my new silicone bead?
A3: Tiny air bubbles trapped in the silicone can be a sign of a weak seal. If you notice them immediately after application, try to smooth them out. If they appear after curing, it might indicate an incomplete seal, and you may need to reapply the sealant in that area.
Q4: Do I need to reseal all the seams, or just the leaking one?
A4: If one seam is leaking, it’s often a sign that the aquarium sealant throughout the tank may be nearing the end of its lifespan. While you can spot-repair a single seam, it’s generally recommended to reseal all seams for long-term peace of mind and structural integrity. This is a more thorough approach to aquarium repair.
Q5: Can I reseal a scratched tank?
A5: Minor scratches on the glass usually don’t affect the seal. However, deep scratches that compromise the glass itself can weaken the tank. If a scratch is very deep or located near a seam, it might require professional assessment or resealing.
Q6: How often do I need to reseal my fish tank?
A6: The lifespan of aquarium silicone sealant can vary, but many manufacturers recommend resealing a tank every 5-10 years, or sooner if leaks are detected. Regular inspection during aquarium maintenance is key.
Conclusion: A Leak-Proof Future for Your Aquarium
Resealing a fish tank might seem like a daunting task, but by following these steps carefully, you can effectively reseal glass aquarium seams and prevent fish tank leaks. This aquarium repair process not only protects your home from water damage but, more importantly, ensures a safe and stable environment for your beloved aquatic pets. With the right aquarium sealant and a bit of patience, you can confidently maintain a beautiful and leak-proof aquarium for years to come. Remember, proper aquarium maintenance is the key to a healthy and long-lasting aquatic world.