
Fish taxidermy, or fish mounting, is the art of preserving a fish to make it look lifelike for display. Professional fish taxidermy involves several key steps to achieve a realistic and lasting fish display.
The art of fish taxidermy is a meticulous craft, transforming a prized catch into a lasting memory. Fish mounting, the core of this process, aims to recreate the vibrant life of a fish, making it a stunning fish display. This detailed work requires patience, skill, and a deep appreciation for the natural world. Whether you’ve caught a trophy fish taxidermy specimen or simply wish to preserve a memorable catch, understanding how fish taxidermy is done sheds light on this fascinating preservation technique.
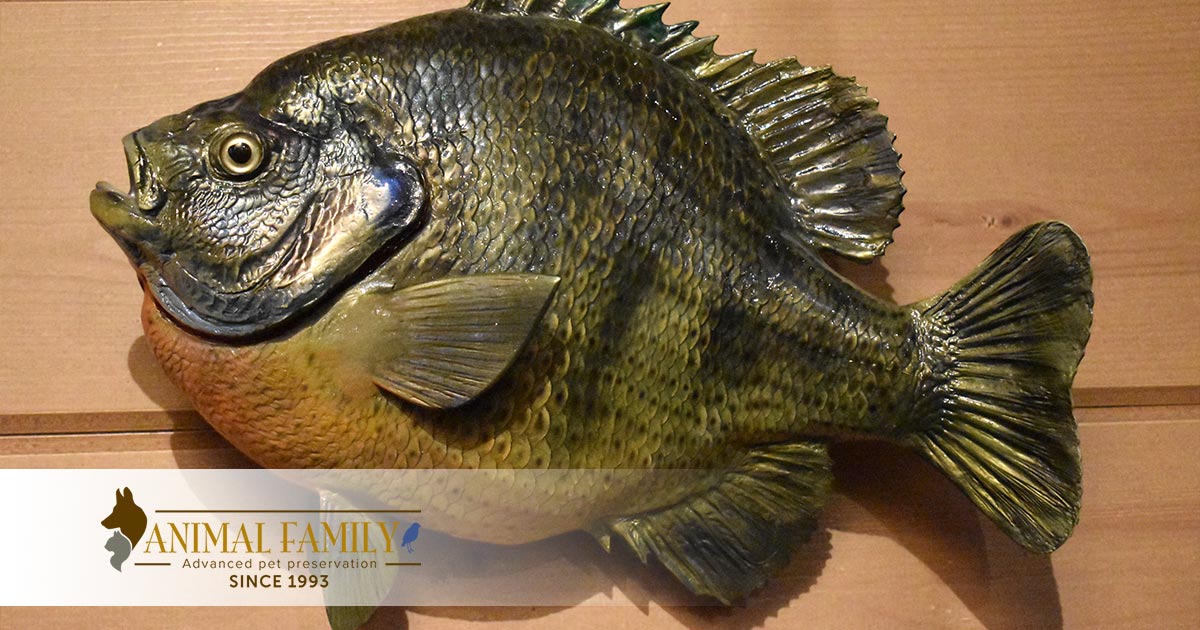
Image Source: animalfamilypet.com
The Journey from Catch to Display: A Step-by-Step Guide
The process of preserving fish for display is a multi-stage endeavor, each step crucial for the final outcome. From the moment a fish is caught to its final placement, careful attention to detail ensures a lifelike representation.
Step 1: Proper Handling of the Fresh Catch
The quality of the final fish art taxidermy piece begins the moment the fish is landed. Proper handling is essential for preserving fish in their most lifelike state.
Immediate Care After Catching
- Minimize Damage: Handle the fish gently to avoid tearing fins or scales.
- Avoid Rough Surfaces: Do not place the fish on rough surfaces like gravel or sand, which can damage its skin and colors.
- Keep it Cool: Immediately cool the fish. Ice is ideal. If ice isn’t available, keep it in a cool, shaded area.
Photographing Your Catch
Good photographs are vital, especially if the fish is to be released. These photos serve as a reference for the taxidermist to recreate the fish’s natural colors and patterns.
- Multiple Angles: Take photos from the side, top, and belly.
- Good Lighting: Use natural daylight whenever possible. Avoid harsh shadows.
- Show Size: Include a ruler or measuring tape in some photos for scale.
- Color Reference: Capture the fish’s colors as accurately as possible. Keep the fish wet to maintain vibrant hues.
Step 2: The Art of Fish Skinning and Preservation
This is a critical stage where the essence of the fish is captured. Fish skinning requires precision to ensure the skin is removed without damage.
Preparing for Skinning
- Cleanliness: Ensure all tools and your work area are clean.
- Fish Condition: The fresher the fish, the better the results.
The Skinning Process
- Make the Incision: A precise incision is made along the ventral side (belly) of the fish, from the gill plate to the tail.
- Separate the Skin: Carefully work the skin away from the flesh, starting from the incision. This is done around the head, body, and tail.
- Fin Removal: The fins are a delicate part of the process. They are either carefully cut from the body or the skin is peeled back to allow for easier preservation of the fin rays.
- Head Detail: The skin around the head, including the operculum (gill cover) and mouth, needs special attention to maintain its shape.
- Scale Removal (Optional): In some cases, a small portion of the scales might be removed to aid in the tanning process, though this is often avoided to maintain the natural look.
Preserving the Skin
Once the skin is removed, it must be treated immediately to prevent decay. This is the heart of fish preservation techniques.
- Fleshing: Any remaining flesh or fat must be carefully scraped off the inside of the skin.
- Salting: The skin is thoroughly packed with salt. This draws out moisture and helps to preserve the tissue.
- Tanning: After salting, the skin is often tanned. Tanning agents, like formaldehyde or specialized tanning solutions, further stabilize the skin, making it supple and preventing it from rotting. This is a crucial step for long-term fish preservation for fishing enthusiasts.
Step 3: Creating the Mannequin or Form
Traditionally, fish taxidermy used the actual fish skin, but modern professional fish taxidermy often uses artificial forms.
Traditional Method (Using the Fish’s Own Body)
- Wood Form: A carved wooden form shaped like the fish was historically used.
- Wire Frame: A wire armature was created to support the fins and tail.
- Skin Placement: The preserved skin was then carefully stretched and glued over this form, with fins positioned using pins and supports.
Modern Method (Using Artificial Forms)
- Fiberglass or Urethane Forms: Today, taxidermists use pre-made fiberglass or urethane forms that are exact replicas of various fish species and sizes.
- Advantages: These forms are durable, lightweight, and offer consistent, accurate shapes. They also reduce the risk of distortion that can occur with traditional methods.
- Customization: Forms can be slightly modified to match specific measurements or characteristics of the actual fish.
Step 4: The Art of Mounting and Sculpting
This is where the lifelike qualities of the fish are brought back. This stage involves detailed sculpting and positioning.
Attaching the Skin to the Form
- Adhesive: A specialized adhesive is applied to the form.
- Careful Stretching: The preserved fish skin is then carefully stretched and applied to the form, ensuring it fits snugly without wrinkles or tears.
- Positioning: The skin is meticulously positioned to match the natural contours of the fish.
Recreating Features
- Eyes: Glass eyes are carefully selected to match the species and size of the fish and are set in place.
- Fins: The fins, often supported by wire or plastic, are carefully positioned. This is a crucial part of creating a dynamic fish display. The fins are often “set” in a lifelike pose, either relaxed or in motion.
- Mouth: The mouth can be posed open or closed, depending on the desired look and reference photos.
- Sculpting Details: Any areas where the skin might have stretched or shrunk are filled and sculpted to recreate the natural musculature and shape of the fish. This often involves clay or other sculpting materials.
Step 5: Painting and Finishing Touches
This is the final, crucial step that brings the fish back to its vibrant, natural appearance.
Color Matching and Application
- Reference Photos: The taxidermist uses the provided photographs as a guide to accurately recreate the fish’s colors, patterns, and subtle gradients.
- Airbrushing: Airbrushing is the most common technique for applying paint. It allows for smooth, even application and subtle blending of colors.
- Hand Brushing: Fine details, such as intricate scale patterns or specific markings, may be added with hand brushes.
- Pearls and Iridescence: Modern paints and techniques can recreate the shimmering, iridescent qualities of fish scales, adding a layer of realism.
Sealing and Glazing
- Protective Coat: A clear, protective sealant is applied to the entire fish to protect the paint and preserve the skin’s finish.
- Gloss or Matte Finish: The sealant can be applied to achieve a natural, matte finish or a slightly glossy look, depending on the species and desired effect.
Step 6: Final Presentation
The completed fish mounting is now ready for its fish display.
Mounting Options
- Wall Mount: The most common method, where the fish is mounted on a wooden plaque or directly to the wall.
- Driftwood or Unique Bases: Some taxidermists mount fish on natural elements like driftwood for a more rustic or artistic appeal.
- Tabletop Displays: Smaller fish or dioramas can be displayed on tables.
Care for Your Mounted Fish
- Dusting: Gently dust the fish with a soft brush or compressed air. Avoid using water or harsh cleaning chemicals.
- Placement: Keep the mounted fish out of direct sunlight, which can cause colors to fade. Avoid areas with high humidity or extreme temperature changes.
Different Approaches to Fish Preservation
While the general process remains similar, specific techniques can vary depending on the type of fish and the desired outcome.
Skin Mounts vs. Reproduction Mounts
- Skin Mounts: This is the traditional method where the actual skin of the fish is used. It’s the most common for trophy fish taxidermy. The skin is preserved and mounted over a form.
- Pros: Captures the unique characteristics and scars of the actual fish. Often considered more authentic.
- Cons: Can be susceptible to shrinkage or distortion if not preserved perfectly. Requires excellent reference photos for coloring.
- Reproduction Mounts: In this method, a cast is made of the fish, and then a new replica is sculpted and painted. This is often used for very large fish, delicate species, or when the original fish needs to be released.
- Pros: Highly durable, consistent quality, and colors can be perfectly matched without relying on fading original skin. Allows for release of the actual fish.
- Cons: Lacks the “actual” skin of the fish, which some purists prefer. Can be more expensive.
Special Considerations for Different Fish Types
- Saltwater vs. Freshwater Fish: Saltwater fish often have more vibrant and iridescent colors, requiring more specialized paints and techniques to replicate.
- Scaleless Fish: Fish like catfish or eels present unique challenges in preserving their smooth skin and shape.
- Large Game Fish: Marlin, tuna, and other large saltwater species often require extensive structural support and specialized preservation to handle their size and weight.
The Role of a Professional Fish Taxidermist
A professional fish taxidermy artist is more than just a craftsman; they are an artist dedicated to capturing the spirit of a catch.
Skills and Expertise
- Anatomical Knowledge: Deep understanding of fish anatomy to ensure accurate posing and form.
- Color Theory and Application: Mastery of color mixing and application techniques to match natural hues.
- Patience and Precision: The ability to work meticulously on delicate materials.
- Material Science: Knowledge of preservation chemicals, adhesives, and sculpting materials.
Choosing the Right Taxidermist
- Portfolio Review: Look at examples of their previous work, especially on fish similar to your catch.
- Communication: Ensure the taxidermist is communicative and willing to discuss your preferences.
- References: Ask for testimonials or references from previous clients.
- Turnaround Time: Be aware that high-quality taxidermy takes time.
Frequently Asked Questions About Fish Taxidermy
Here are some common questions people have about preserving fish and fish mounting.
How long does fish taxidermy take?
The time it takes for fish taxidermy can vary greatly. For a standard skin mount, it typically takes anywhere from 4 to 12 months. This includes the time for skin preservation, drying, mounting, and painting. Reproduction mounts might take a similar amount of time. Rush orders are sometimes available but can increase the cost.
Can I preserve my own fish?
While it’s possible to learn fish preservation techniques and attempt it yourself, professional fish taxidermy is a complex art that requires significant skill, specialized tools, and chemicals. For a high-quality, lifelike fish display, it’s generally recommended to entrust your catch to a professional. Improper preservation can lead to the mount deteriorating over time or not looking lifelike.
What happens to the fish’s body?
In a traditional skin mount, the fish’s skin is carefully removed. The flesh, bones, and internal organs are discarded after the skin has been treated. For reproduction mounts, only a mold or cast is made, and the original fish is either released or handled according to the angler’s wishes.
How do I care for my mounted fish?
Care involves gentle dusting with a soft brush or compressed air. Avoid water, household cleaners, and direct sunlight, as these can damage the paint and skin. Keep the mount in a stable environment away from extreme temperature fluctuations or humidity.
What is the difference between a skin mount and a reproduction mount?
A skin mount uses the actual preserved skin of the fish, mounted over a form. A reproduction mount is a replica created from a mold of the original fish, which is then sculpted and painted. Reproduction mounts are often chosen for their durability and ability to perfectly capture original colors, especially for fish that might have faded quickly.
Is fish taxidermy expensive?
The cost of fish taxidermy can range from a few hundred dollars for smaller fish to several thousand dollars for very large or complex mounts. Factors influencing cost include the size of the fish, the type of mount (skin vs. reproduction), the complexity of the pose, and the reputation of the taxidermist. It’s an investment in preserving a significant memory.
By adhering to these steps and employing skilled craftsmanship, the art of fish taxidermy transforms a fleeting moment into a timeless fish display, celebrating the beauty and thrill of angling.